유데미 스타터스 취업 부트캠프 유니티 1기 5주차 학습 일지
유니티 기초에 대해 공부했습니다.
1. 오브젝트 생성
hierarchy창에서 생성하는 오브젝트처럼 오브젝트를 스크립트로 생성할 수 있습니다.
GameObject go = GameObject.CreatePrimitive(PrimitiveType.Cube);PrimitiveType.Cube 대신 PrimitiveType.Capsule, PrimitiveType.Cylinder, PrimitiveType.Plane,PrimitiveType.Quad, PrimitiveType.Sphere 도 들어갈 수 있습니다.
2.오브젝트 파괴
Destroy(go);
Destroy(go, 3f); // 3초 뒤에 파괴
즉시 파괴 하고 싶다면 DestroyImmediate(); 도 사용할 수 있지만 사용하지 않는 것을 권고하고 있습니다.
3. 오브젝트 활성화 여부 확인
Debug.Log(go.activeSelf);  //Hierarchy 창에서 글씨가 흰색, 회색이냐 나눠져 있음, 부모 자식 있을때 자식은 체크되어있고 부모는 안되어있을때도 자식은 true로 나옴
Debug.Log(go.activeInHierarchy); //실제 하이러키 상에서 활성화가 되어있는지 여부를 알려주는 것
Debug.Log(goParent.activeSelf);
Debug.Log(goParent.activeInHierarchy);
Debug.Log(goChild.activeSelf);
Debug.Log(goChild.activeInHierarchy);
- activeSelf 같은 경우 부모 자식 있을때, 자식은 체크되어있고 부모는 안되어있을때도 자식은 true로 나옵니다.
- activeInHierarchy같은 경우, 실제 하이러키 상에서 활성화가 되어있는지 여부를 알려줍니다. 이때, 부모가 비활성 상태이면 자식도 비활성 상태로 false가 리턴됩니다.
4. 태그
Debug.Log(gameObject.CompareTag("GOExample"));- 태그가 같은지 비교하여 boolean 값으로 떨궈줍니다.
5. 태그나 이름으로 오브젝트 검색하기
1) 태그
        //5. Tag로 검색
        //태그를 통해서 액티브된 애들만 찾을 수 있다.
        //transform.find 는 자식만 찾을 수 있다.
        //"Turret"이라는 같은 이름의 오브젝트가 여러개인 경우에는 transform.Find("Turret").gameObject 로 찾는다.
        //태그가 같을 경우, 하이러키에서 제일 위에꺼를 찾음.
        GameObject goWithTag1 = GameObject.FindWithTag("Player");
        GameObject goWithTag2 = GameObject.FindWithTag("Finish");
        Debug.Log(goWithTag1.name);
        Debug.Log(goWithTag2.name);
        Debug.Log(goWithTag1 != null);
        Debug.Log(goWithTag2 != null);
2) 이름
//6. 이름으로 검색
GameObject goWithFind1 = GameObject.Find("FindWithName");
GameObject goWithFind2 = GameObject.Find("FindWithName2");
Debug.Log(goWithFind1 != null);
Debug.Log(goWithFind1.name);
Debug.Log(goWithFind2.name);
Debug.Log(goWithFind2 != null);
6. 실행 중 오브젝트 생성
GameObject goTest = Instantiate(goPrefab); //미리 만들어놓은 프리팹이라는 걸로 사용정의 게임오브젝트
goTest.name = "Cube";
goTest.transform.parent = goParent.transform;
goTest.transform.localPosition = Vector3.zero; // (0,0,0)
goTest.transform.localRotation = Quaternion.identity;
goTest.transform.localScale = Vector3.one;
- instantiate를 사용하여 게임 실행 도중에 오브젝트를 생성할 수 있습니다.
7. 컴포넌트 생성
//camera, gameobject 등등 MonoBehaviour을 상속받는건 다 들어올 수 있음
AudioSource asrc = transform.AddComponent<AudioSource>();
AudioSource asrc = transform.GetComponent<AudioSource>();

transform.GetComponent<AudioSource>();
transform.GetComponent<Component>(); // 제일 상위 꺼 받아옴

//자기 자식에 있는 컴포넌트 다 찾아옴
Component[] com = transform.GetComponentsInChildren<Component>(true);

//includeInactive : active꺼진 애들도 가져올건지
AudioSource[] asrcArray =  transform.GetComponentsInChildren<AudioSource>(true);
8. hierarchy 창에서 우선순위 조정
Debug.Log(transform.GetChild(0).name);
tr1.SetAsLastSibling();
Debug.Log(transform.GetChild(0).name);
tr1.SetAsFirstSibling();
Debug.Log(transform.GetChild(0).name);
tr1.SetSiblingIndex(1);
Debug.Log(tr1.parent.name);
//tr1.root; //최상위 부모 가져옴
9. void Update()
 void Update() // 회전하거나 움직일 때 한번밖에 안불리면 안됌. 계속 움직여야 함.
    {
        // 컴파일 에러
        //.x에서 문제 -> vector3는 struct임-> 값에 의한 복사-> 값을 넣더라도 적용이 안됌
        //transform.position 는 클래스 -> 참조 복사가 일어남
        //transform.position.x += 0.01f;

        //local 포지션은 자식 포지션
        Vector3 vecP = transform.localPosition;
        vecP.x += 0.01f;
        transform.localPosition = vecP;

        Vector3 vecR = transform.localRotation.eulerAngles;
        vecR.x += 0.01f;
        transform.localRotation = Quaternion.Euler(vecR);

        Vector3 vecS = transform.localScale;
        vecS.x += 0.01f;
        transform.localScale = vecS;
    }
-vector3은 struct 이기 때문에 값 복사입니다. 따라서 값을 넣는다 하더라도 적용되지 않습니다.
10. SceneManager
// Start is called before the first frame update
    void Start()
    {

        DontDestroyOnLoad(this.gameObject);
        SceneManager.LoadScene(1); //Index 로 불러옴
        //SceneManager.LoadScene("2"); // 이름으로 불러옴

        //SceneManager.LoadScene("2", LoadSceneMode.Single); //Defalut,
        //SceneManager.LoadScene("2", LoadSceneMode.Additive); //scene1이 살아있는 상태로 불림, 앞 씬 카메라 x -> 뒤에 생긴 카메라, 왠만하면 카메라 안넣음
    }
- Scene 이동 전에 DontDestroyOnLoad를 통해 이전 씬에서 어떤 데이터를 유지할지 넣어줍니다.
11. occlusion - 메모리 절약을 위한
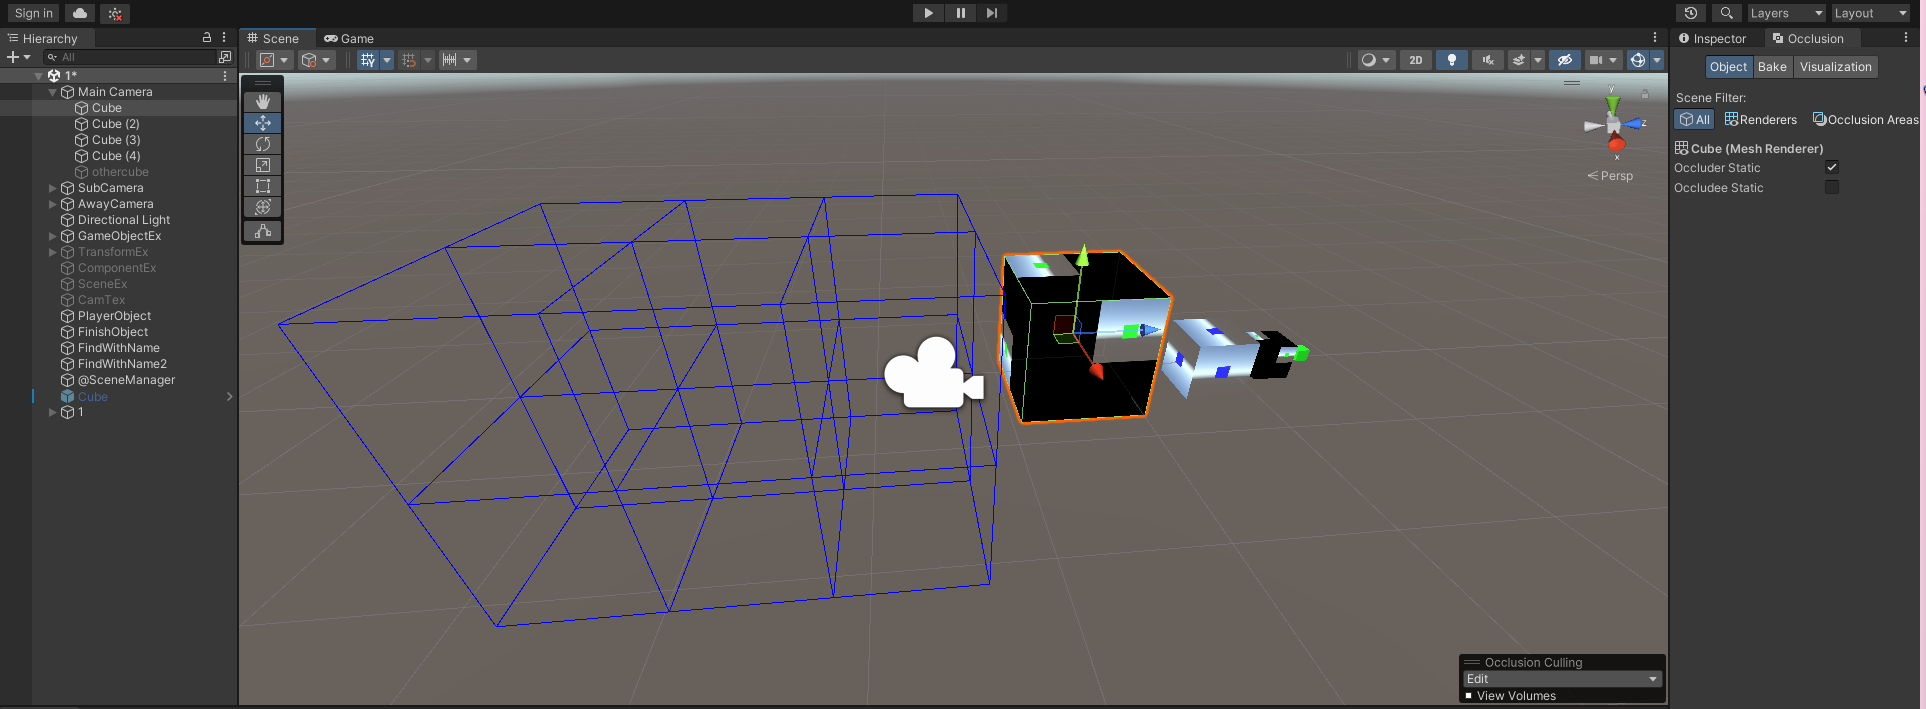
위의 큐브 4개를 가리는 것(occluder), 가려지는 것(occludee) 을 설정해줍니다. 이때 두가지 상태를 모두 가질 수도 있습니다.
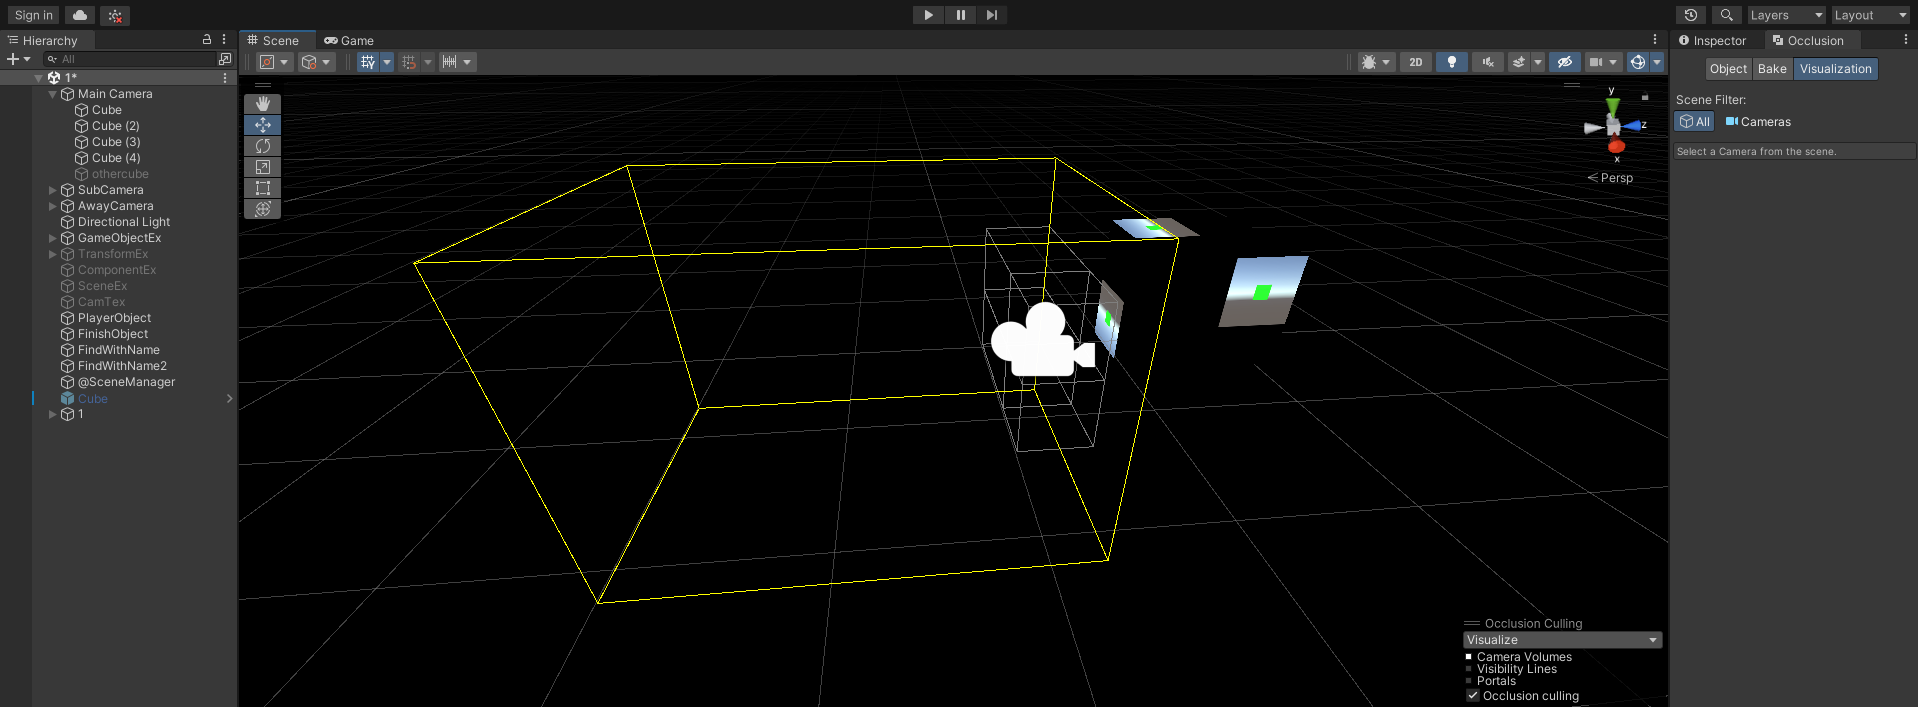
모드를 overdraw로 바꿔주고 occlusion에서 bake를 할 시, 렌더링된 모습을 확인할 수 있습니다.
12. 충돌처리
//private void OnCollisionEnter(Collision collision)
    //{
        //두 객체가 충돌 시 호출되는 함수
    //}

    //private void OnCollisionStay(Collision collision)
    //{
        //두 객체가 충돌하는 동안 호출되는 함수
    //}

    //private void OnCollisionExit(Collision collision)
    //{
        //두 객체가 충돌을 끝 마치면 호출되는 함수
    //}

    //private void OnTriggerEnter(Collider other)
    //{

    //}

    ////
    //private void OnTriggerExit(Collider other)
    //{

    //}


    ////겹쳐있는 상태도 인정
    //private void OnTriggerStay(Collider other)
    //{

    //}
13. void FixedUpdate()
: 항상 똑같은 수치로 불립니다(0.02초), render관련해서는 보통 update 함수를 사용합니다.
14. Input
 	if (Input.GetKeyDown(KeyCode.A))
        {
            m_nCount = 50;
            m = ForceMode.Force;
            // force * deltaTime / mass
            // F = 20 * 0.02 / 1
            // v2 = 0.204
        }

        if (Input.GetKeyDown(KeyCode.S))
        {
            m_nCount = 50;
            m = ForceMode.Acceleration;
            // force * deltaTime
            // F = 20 * 0.02
            //
        }

        if (Input.GetKeyDown(KeyCode.D))
        {
            m_nCount = 50;
            m = ForceMode.Impulse;
            // force / mass
            // F = 20 / 1
            //
        }

        if (Input.GetKeyDown(KeyCode.F))
        {
            m_nCount = 50;
            m = ForceMode.VelocityChange;
            // force
            // F = 20
        }
- GetKeyDown 은 키가 눌렸을 때
- GetKey는 키를 누르고 있을 때
- GetkeyUp은 키를 눌렀다 뗐을 때
15. 벡터
//Vec2.nomalize  //값바꿈
//vec2.scale

//Vector3.one; // 1,1,1
//Vector3.zero; //0,0,0
//Vector3.left; //x축으로 , -1,0,0
//Vector3.right; // 1,0,0
//Vector3.up; //0,0,1
//Vector3.down; //0,-1, 0
//Vector3.back;
//Vector3.forward;
//Vector3.Distance(vec, vec2); //두 벡터 사이의 거리를 잼
//Lerp 는 Linear Interpolation으로 선형보간이다.
//선형보간은 더 부드럽게 움직이게 해준다.
Debug.Log(Vector3.Lerp(vec, vec2, 0.5f));16. Ray
:충돌에서 유용하게 쓰입니다.
: Raycast 스크립팅을 가진 게임오브젝트의 원점에서 내가 설정한 방향으로 Ray를 날려 내가 설정한 거리 이내에 물체가 있는지 없는지 충돌감지합니다.
RaycastHit hit;
if(Physics.Raycast(transform.position, Vector3.forward, out hit, 100f, LayerMask.NameToLayer)) //return 형이 bool
        {
            hit.transform.GetComponent<GameObject>().SetActive(false);
        }
——————————————————————————
유데미코리아 바로가기 : https://bit.ly/3b8JGeD
본 포스팅은 유데미-웅진씽크빅 취업 부트캠프 유니티 1기 과정 후기로 작성되었습니다.